Discover Exciting Plastic Manufacturing Jobs at Allied Plastics

How to Use Vacuum Forming Plastic for Your Next Project?

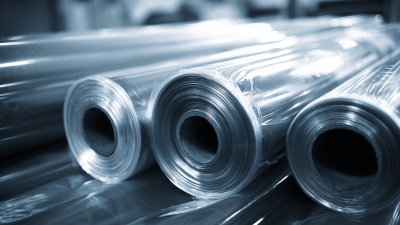
Vacuum forming plastic is a versatile technique used in various projects. It involves heating plastic sheets and forming them over a mold. This process can produce intricate shapes with great detail.

When considering vacuum forming, think about your project’s needs. Do you require durability, flexibility, or insulating properties? The material choice is crucial for success. Even small mistakes can lead to improper forming.

Experimentation is also essential. You might not always get the desired outcome on your first attempt. Learn from the failures to improve your skills. Vacuum forming plastic has a learning curve, but it can yield impressive results when done right.

How to Use Vacuum Forming Plastic for Your Next Project?

Understanding Vacuum Forming: Principles and Applications

How to Use Vacuum Forming Plastic for Your Next Project?

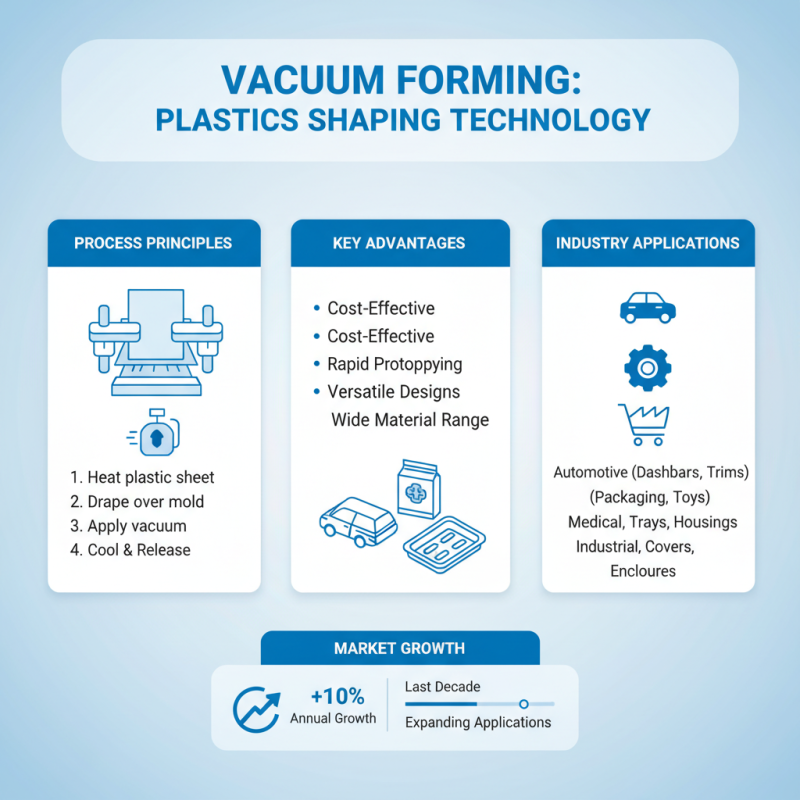
Vacuum forming is a popular technique in the plastics industry. This method allows for shaping plastic sheets into various forms through a vacuum process. Understanding the basic principles of vacuum forming can significantly enhance its applications. In the last decade, this method has gained traction in sectors like automotive and consumer goods, with market reports indicating a growth rate of approximately 10% per year.

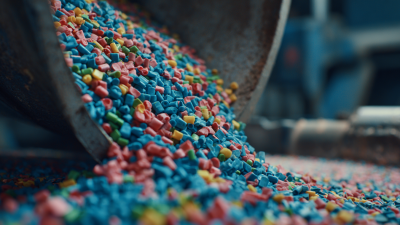
The process begins with heating a plastic sheet until it becomes pliable. It is then placed over a mold. A vacuum is created, pulling the sheet tightly around the mold. This technique is advantageous because it reduces material waste, making it eco-friendly. Reports suggest that companies have reduced scrap rates by 15% by adopting this method. However, challenges exist. Issues like inconsistent heating or material thickness can lead to imperfect forms, prompting the need for careful adjustments in setup.

Despite its advantages, vacuum forming may not be suitable for all designs. Complex geometries and intricate details require additional consideration. Designers often need to experiment with molds to achieve desired results. This trial-and-error process can be time-consuming, with some estimates suggesting it adds an extra 20% to production time for complicated projects. These factors highlight the importance of thorough planning while using vacuum forming for various applications.

Materials Needed for Vacuum Forming Projects

When diving into vacuum forming projects, selecting the right materials is crucial. Begin with high-quality thermoplastic sheets. Common choices include ABS, PVC, and PETG. Each type has unique properties, so choose based on your project needs. ABS is tough and versatile, while PVC offers good clarity and is lightweight.

Mind the thickness of the plastic. Thinner sheets are easier to form, but thicker sheets provide durability. You might want a mix for complex shapes. Remember to cut the sheets accurately. Any mistakes can lead to wasted materials.

Tips: Always preheat your plastic sheets. A uniform temperature ensures better results. Consider using a heat gun for small areas that need extra warmth. Also, ensure your mold is clean and smooth. Imperfections in the mold will show on the finished product.

Pay attention to ventilation when melting plastics. Safety should always be a priority. Test different plastics and thicknesses before your final project. This practice can save time and material down the line. Take notes on what works best and what doesn’t. Reflection is key to mastering vacuum forming.

How to Use Vacuum Forming Plastic for Your Next Project?

Material Description Uses Thickness (mm)
Acrylic A clear thermoplastic that is shatter-resistant and lightweight. Light fixtures, covers, and models. 1.5 - 4.0
PETG A clear thermoplastic with good impact resistance. Food packaging, displays, and prototyping. 0.5 - 2.0
PVC A versatile plastic that can be rigid or flexible. Signs, displays, and model making. 1.0 - 3.0
HIPS High Impact Polystyrene, known for its rigidity and low cost. Model kits, packaging, and displays. 0.5 - 2.5
PP Polypropylene, known for its chemical resistance and fatigue resistance. Containers, automotive parts, and medical applications. 0.5 - 2.0

Step-by-Step Guide to the Vacuum Forming Process

Vacuum forming is a simple and effective technique. It’s popular among hobbyists and designers. The process begins with choosing the right plastic sheet. Common options include ABS and polystyrene. These materials are easy to shape and mold. Cut the sheet to size. Ensure it fits your design.

Next, heat the plastic evenly. An oven works well for this step. Monitor the temperature closely; too hot, and the plastic may warp. Once the plastic is flexible, move quickly. Place it over your mold. Ensure it aligns correctly; otherwise, the final product may be disappointing. Use a vacuum to pull the plastic tightly against the mold.

After cooling, remove the formed piece. This is often the tricky part. If the mold isn't released properly, you may damage your work. Check for imperfections. Sand any rough edges or small flaws. These details matter. Take a moment to reflect on your process. What worked? What didn’t? Each project teaches us something valuable for next time.

Post-Processing Techniques for Vacuum Formed Plastics

Post-processing vacuum formed plastics can elevate your project significantly. Once your plastic is formed, the initial appearance may not meet your expectations. Edges might be rough, or there might be visible lines from the mold. These imperfections can be bothersome, so addressing them is essential.

Sanding is a simple yet effective method for smoothing out the surface. Use fine-grit sandpaper to carefully work on the edges. This process helps remove sharp corners and gives a more polished look. However, be cautious. Over-sanding can lead to an uneven surface that is hard to correct.

Another technique is painting. A fresh coat can hide many flaws. Before applying paint, ensure the surface is clean and dry. A primer can also improve adhesion. Remember, however, that different plastics react differently to paint. Test on a small piece first. This cautious approach can save time and materials in the long run. Keep experimenting with each project to discover what works best for you.

Common Mistakes to Avoid in Vacuum Forming Projects

Vacuum forming is a great technique for creating custom plastic parts. However, many people make common mistakes that can ruin their projects. One common error is not properly preparing the mold. A mold with sharp edges or intricate details can lead to uneven plastic distribution. Smooth surfaces are essential for better results.

Another mistake is inadequate heating of the plastic sheet. If it’s not heated evenly, it won't form correctly. Be sure to monitor the temperature closely. Too much heat can cause the plastic to sag, while too little can result in incomplete forming. It’s a fine balance to strike.

Finally, rushing the cooling process can lead to warping. Allow the formed plastic to cool naturally before handling it. Many people overlook this step, thinking they can speed things up. Patience here pays off in the long run. Learning from these mistakes can greatly improve your vacuum forming projects.

Common Mistakes to Avoid in Vacuum Forming Projects